How to Organize a Small Pantry With Deep Shelves: 12 Smart Ideas
Deep pantry shelves sound useful until half your snacks disappear behind a bag of flour and you find three open boxes of the same thing. The extra depth can hold a lot, but only if you can actually reach and see what’s back there.
The best fix isn’t buying matching containers for every inch. It’s giving the depth a job. Use bins that pull forward, turntables for bottles, baskets for loose packets, and front-and-back rows that still let you reach what’s behind them. If cabinet space is tight, the top of the fridge can also handle some overflow storage.
If you’re figuring out how to organize a small pantry with deep shelves, these ideas focus on making the space easier to use every day, not just prettier for a photo.
1. Keep Baking Staples Up Front
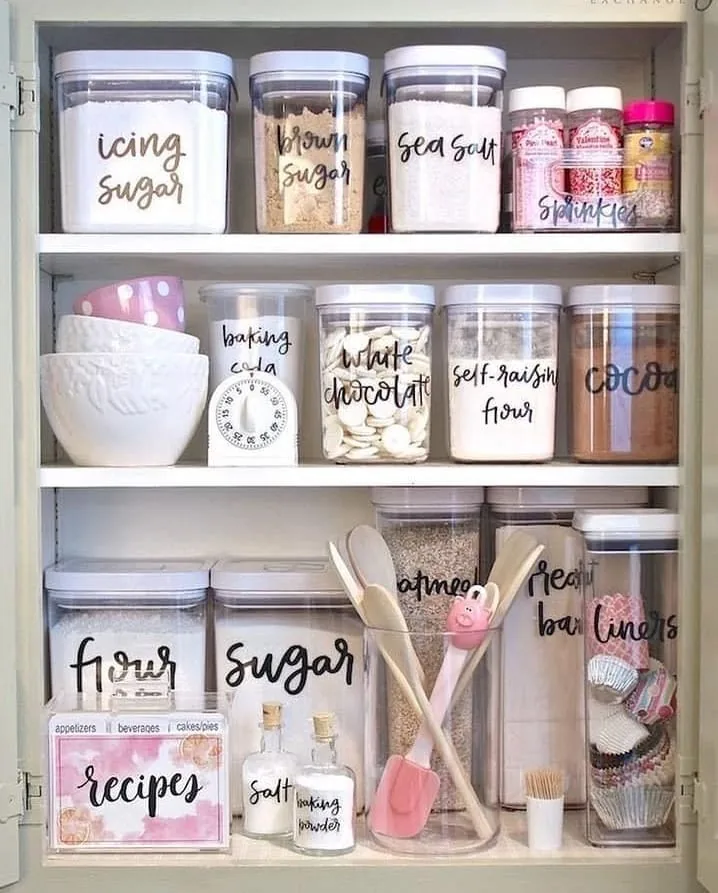
Flour, sugar, oats, cocoa, and baking extras are much easier to manage when they’re out of their original bags. The clear canisters in this pantry make the contents obvious at a glance, and the tall shapes use the shelf height well.
I’d keep the most-used ingredients right at the front. Refills can sit behind them. That way the deep shelf still gets used, but you’re not digging through bags every time you bake.
2. Let Bins Do The Digging
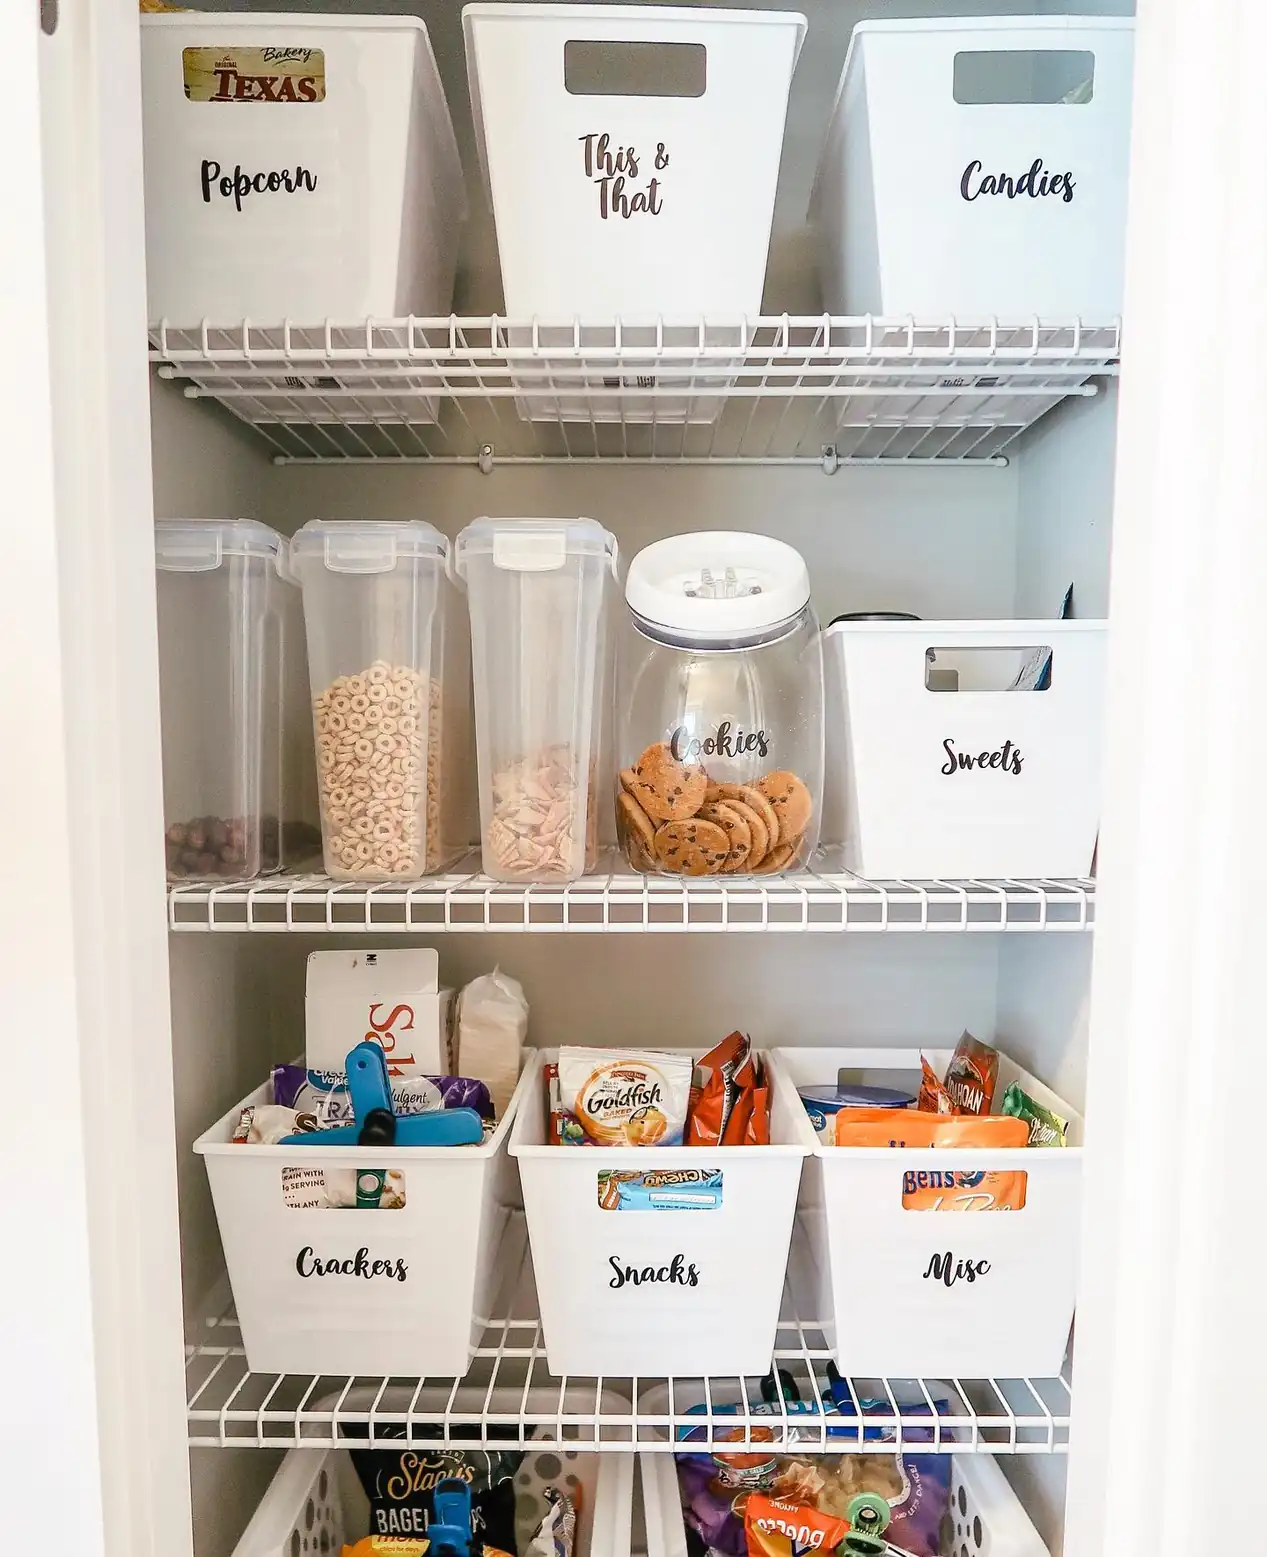
Loose snack bags are where deep shelves usually start going wrong.
The white bins here fix that by turning crackers, snacks, sweets, and other small packages into pull-out groups. Instead of reaching behind three bags to find the fourth, you pull out one bin and see the whole category.
Simple. And probably more useful than decanting every single snack.
3. Give Every Shelf A Job
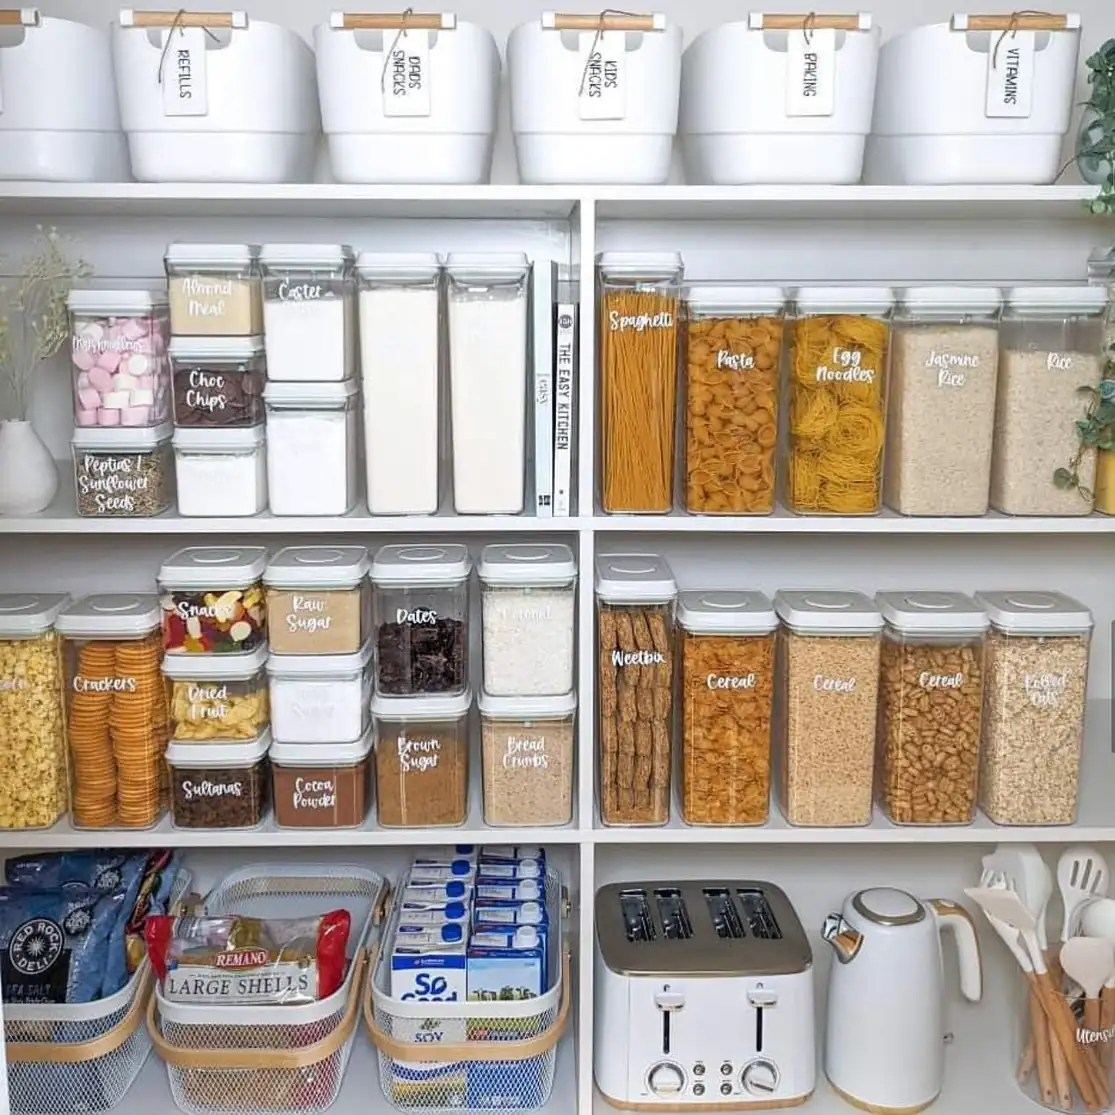
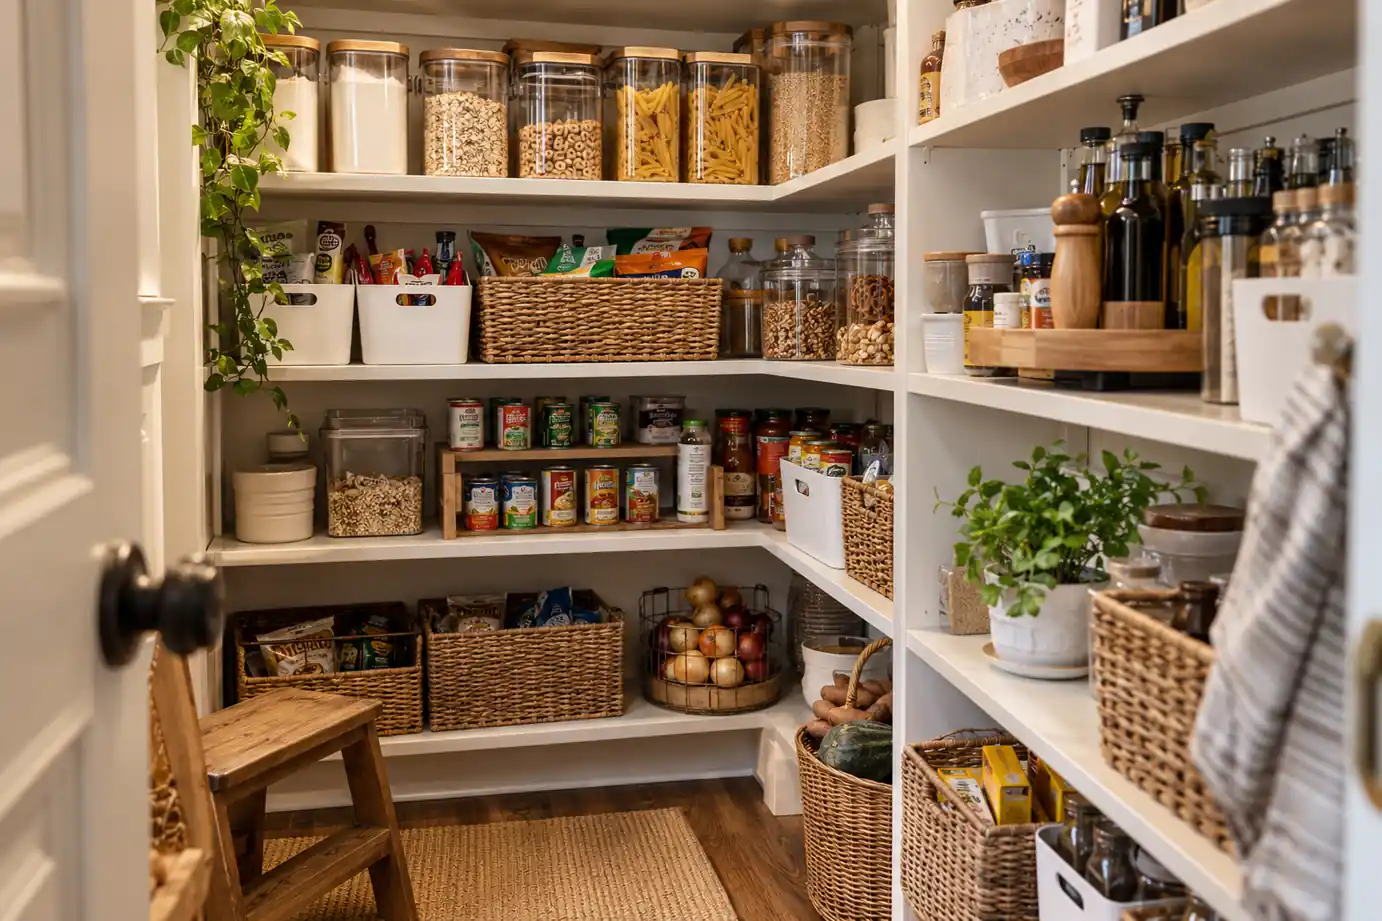
This pantry isn’t relying on one storage trick. The shelves are divided by purpose.
The top holds labeled bins for refills and extras. Clear containers take care of dry food in the middle. Lower shelves handle baskets, cartons, and appliances.
You don’t need the same containers or even the same layout. Just decide what each shelf is responsible for before you start filling it. It cuts down on random leftovers landing wherever there happens to be space.
4. Use A Front And Back Row
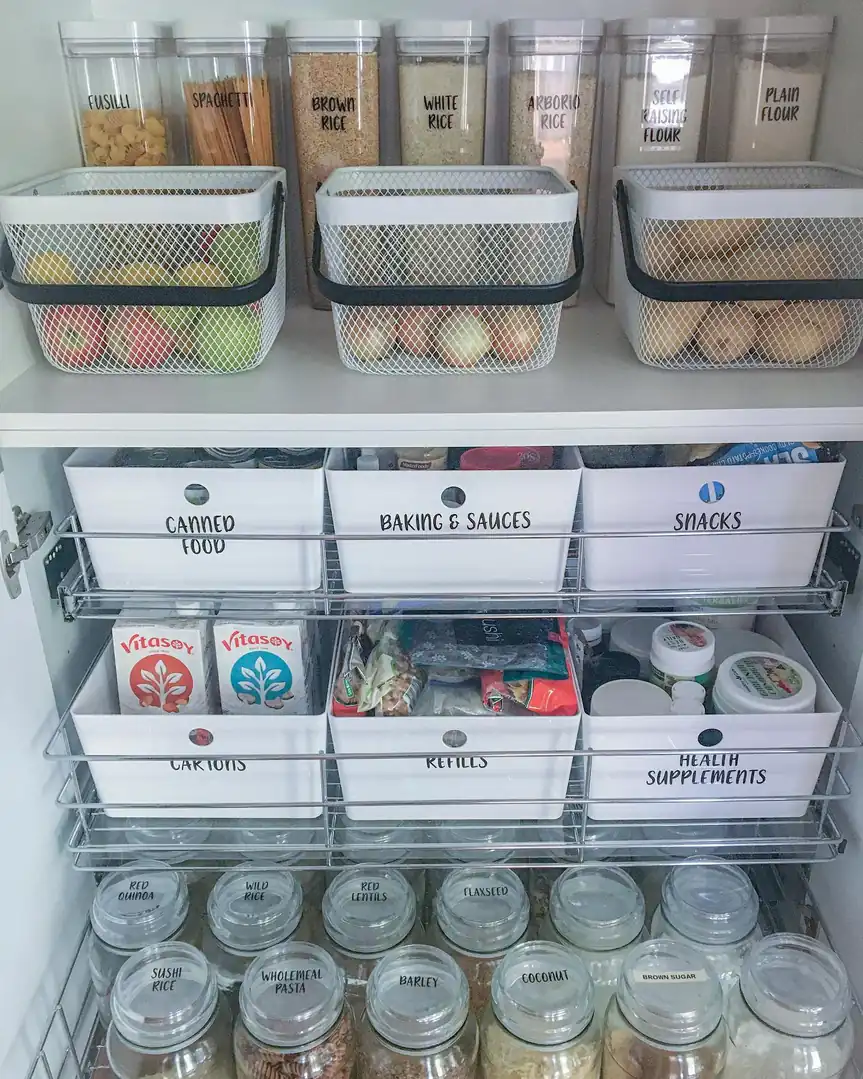
This is one of the better ideas for a genuinely deep shelf.
Tall containers sit at the back. Removable baskets sit in front.
The front row doesn’t permanently block anything because you can lift the whole basket out in one move. That gives you two storage layers without creating a forgotten food graveyard at the back.
I’d use the front baskets for items you grab often and the rear row for dry staples that stay neatly upright.
5. Don’t Decant Every Single Thing
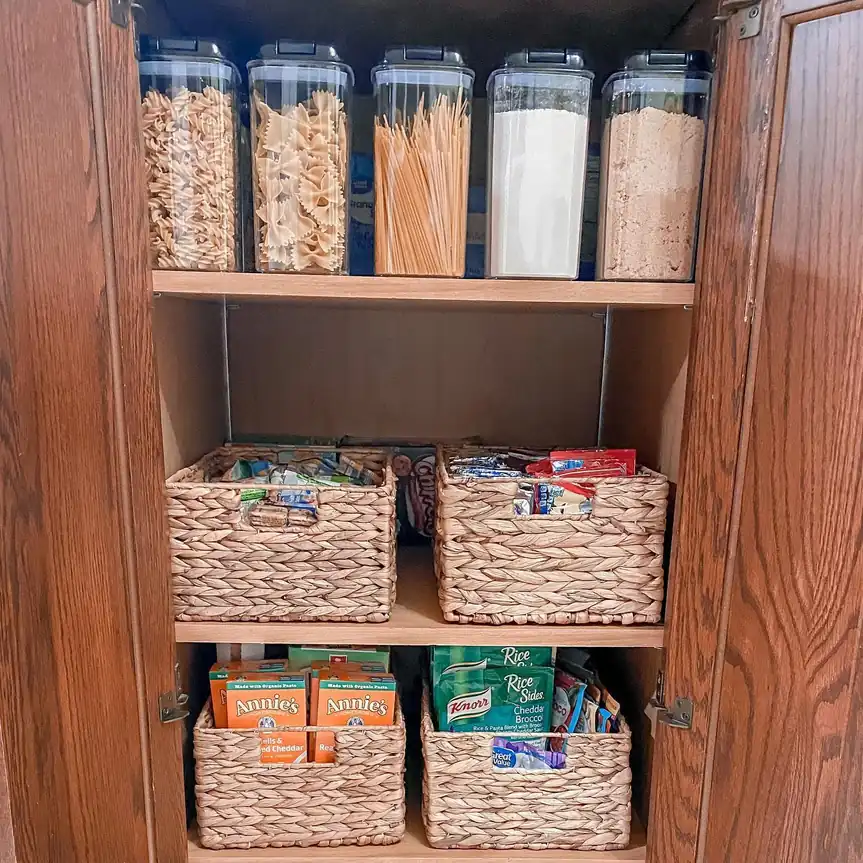
The woven baskets are doing the real cleanup here.
Snack packs, boxed foods, and odd-shaped packets disappear into the baskets, while pasta and baking staples stay in clear containers above.
I wouldn’t try to make every pantry item match. Some foods behave better in a basket.
6. Spin Bottles Instead Of Reaching
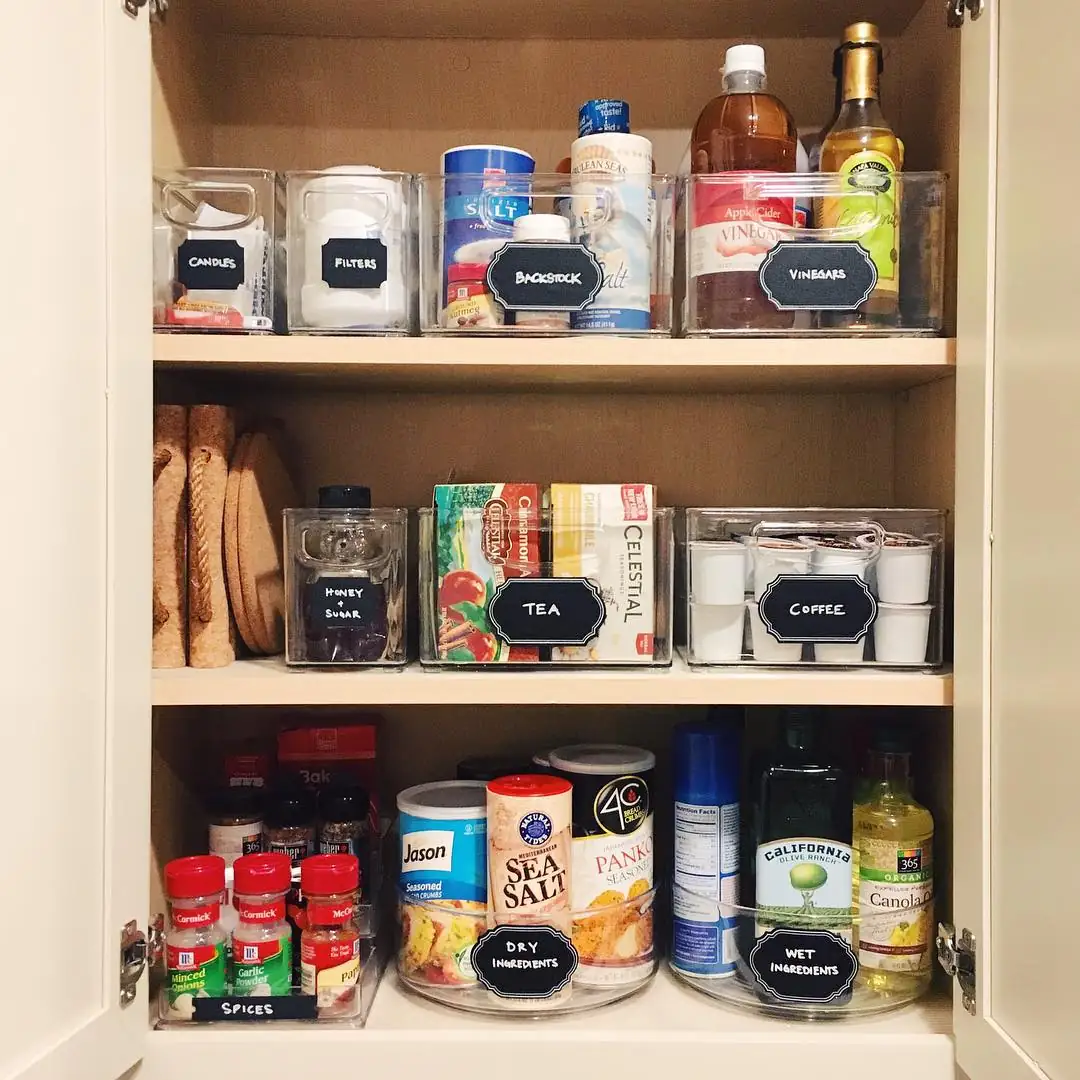
Oils, vinegars, salts, and small jars are awkward on a deep shelf because the bottle you need is always the one hiding at the back.
The turntables here solve that without wasting much space. Spin, grab, done.
The clear bins above are better for tea, coffee, filters, and other rectangular items. Different problem, different organizer.
7. Make The Shelf Come Out
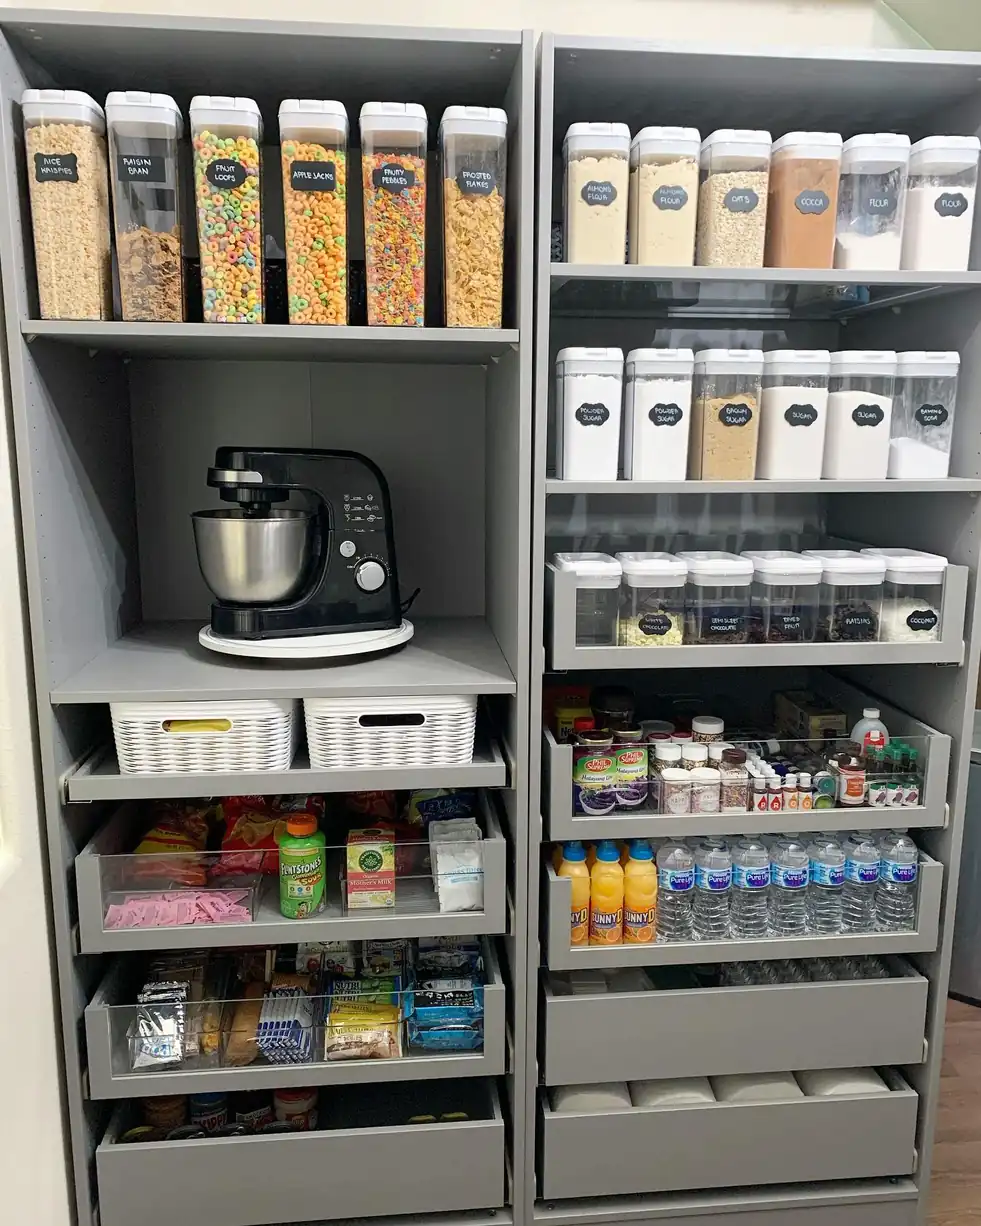
If the pantry is very deep, pull-out drawers beat almost every organizer you can place on a fixed shelf.
The lower half of this setup holds snacks, drinks, jars, and packets several rows deep, but nothing is stuck out of sight. The whole row slides forward.
That’s the upgrade I’d prioritize over buying dozens of matching containers.
8. Put Small Bottles On Doors
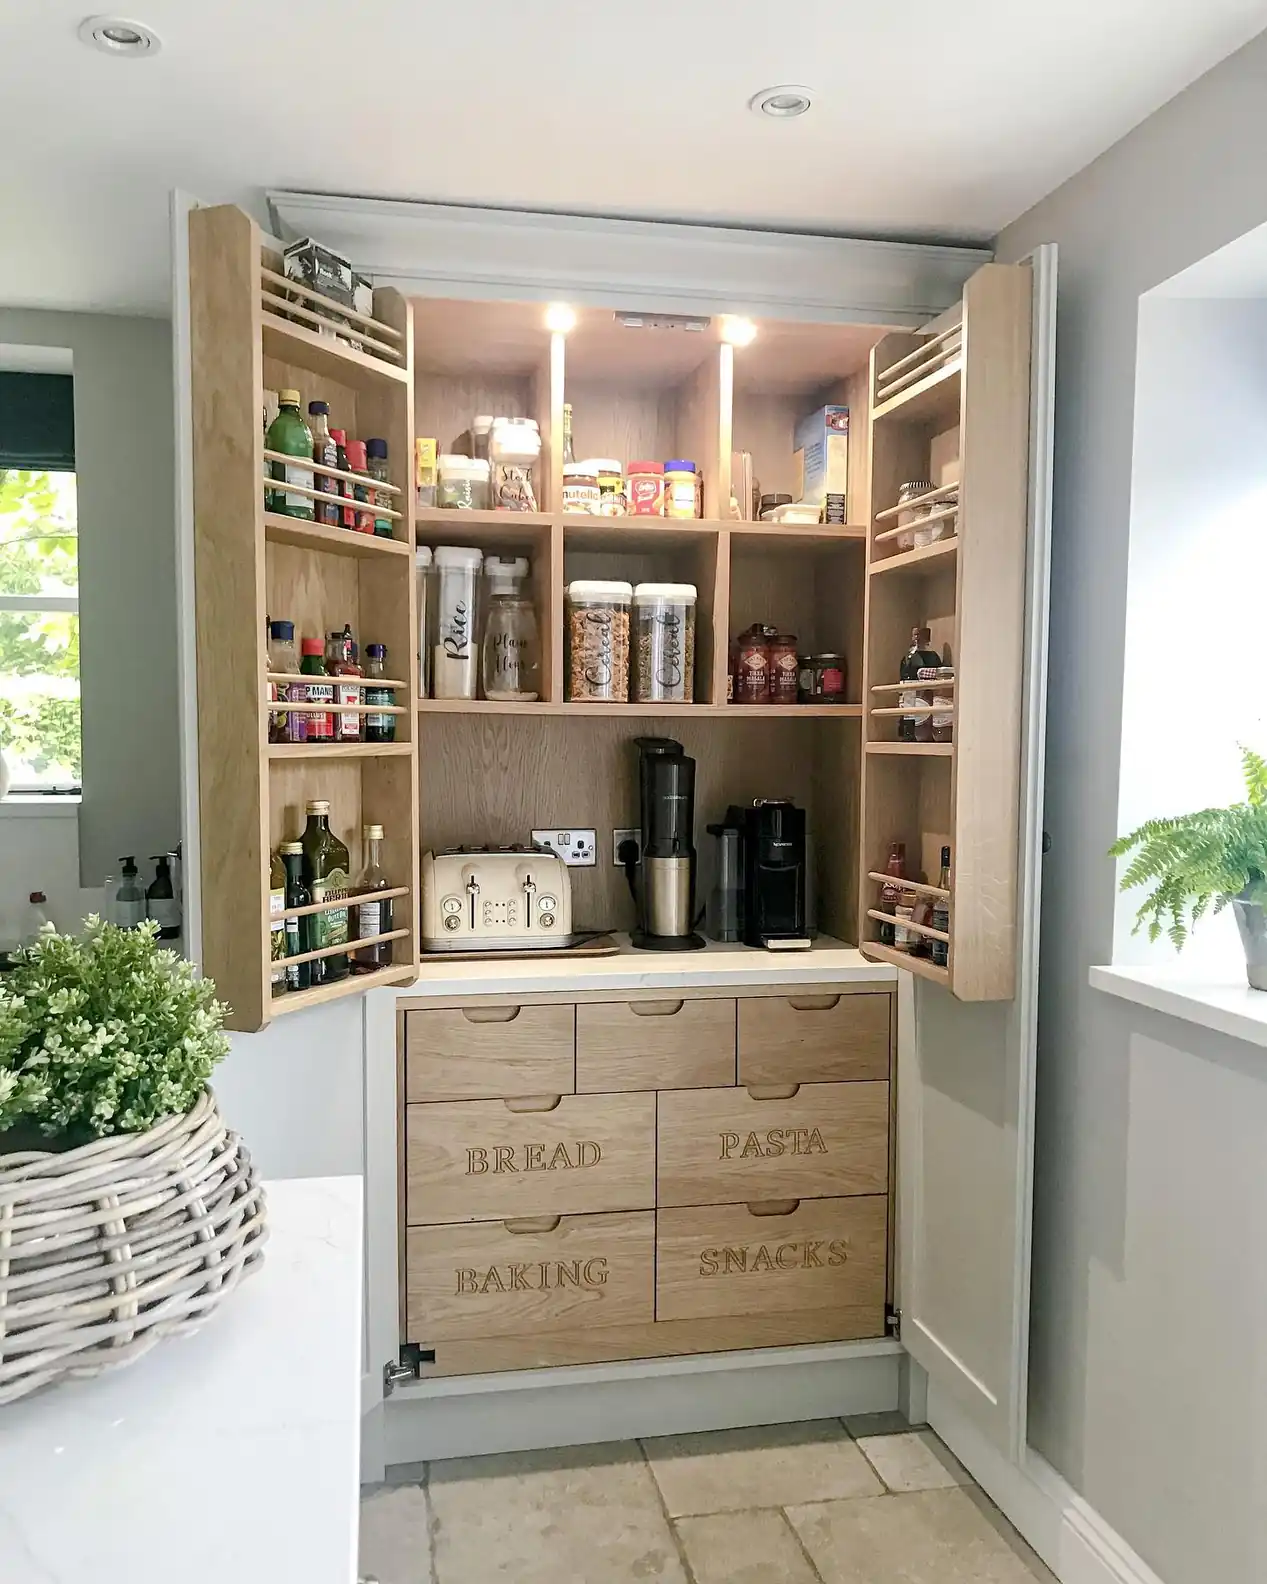
The narrow racks on these doors are easy extra storage.
Sauces, oils, seasonings, and little bottles sit upright where you can see them, while the deeper cabinet shelves stay open for larger containers and appliances.
Nothing fancy. Just space that would otherwise be wasted.
9. Stop Hiding Tiny Spice Jars
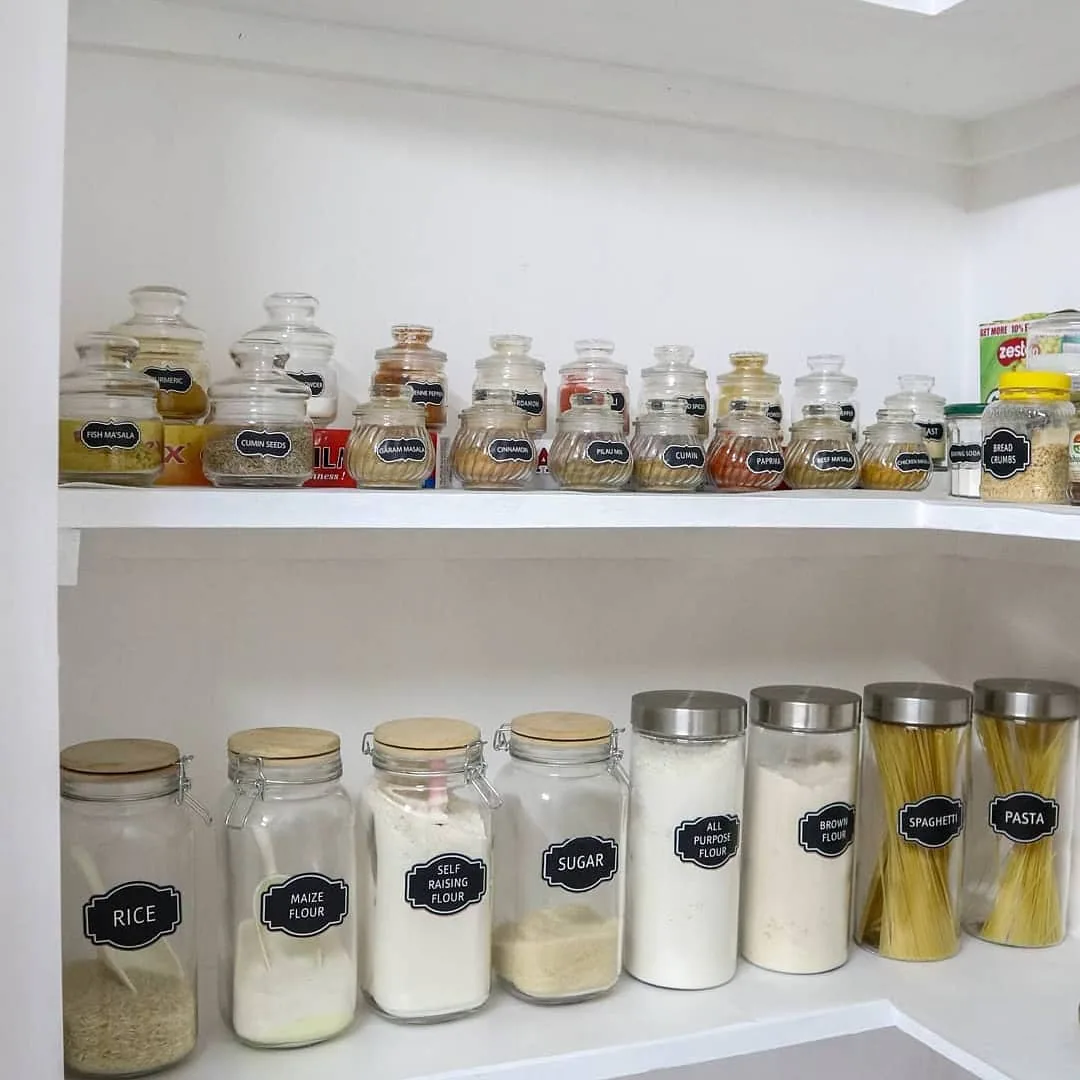
Small jars don’t belong behind flour containers.
Here, the spices get a shelf of their own, while rice, flour, sugar, and pasta stay together below. It’s a small change, but it means you can actually see the jar you need.
Keep the spice row shallow and visible rather than trying to fill every inch behind it.
10. Match Containers To Shelf Height
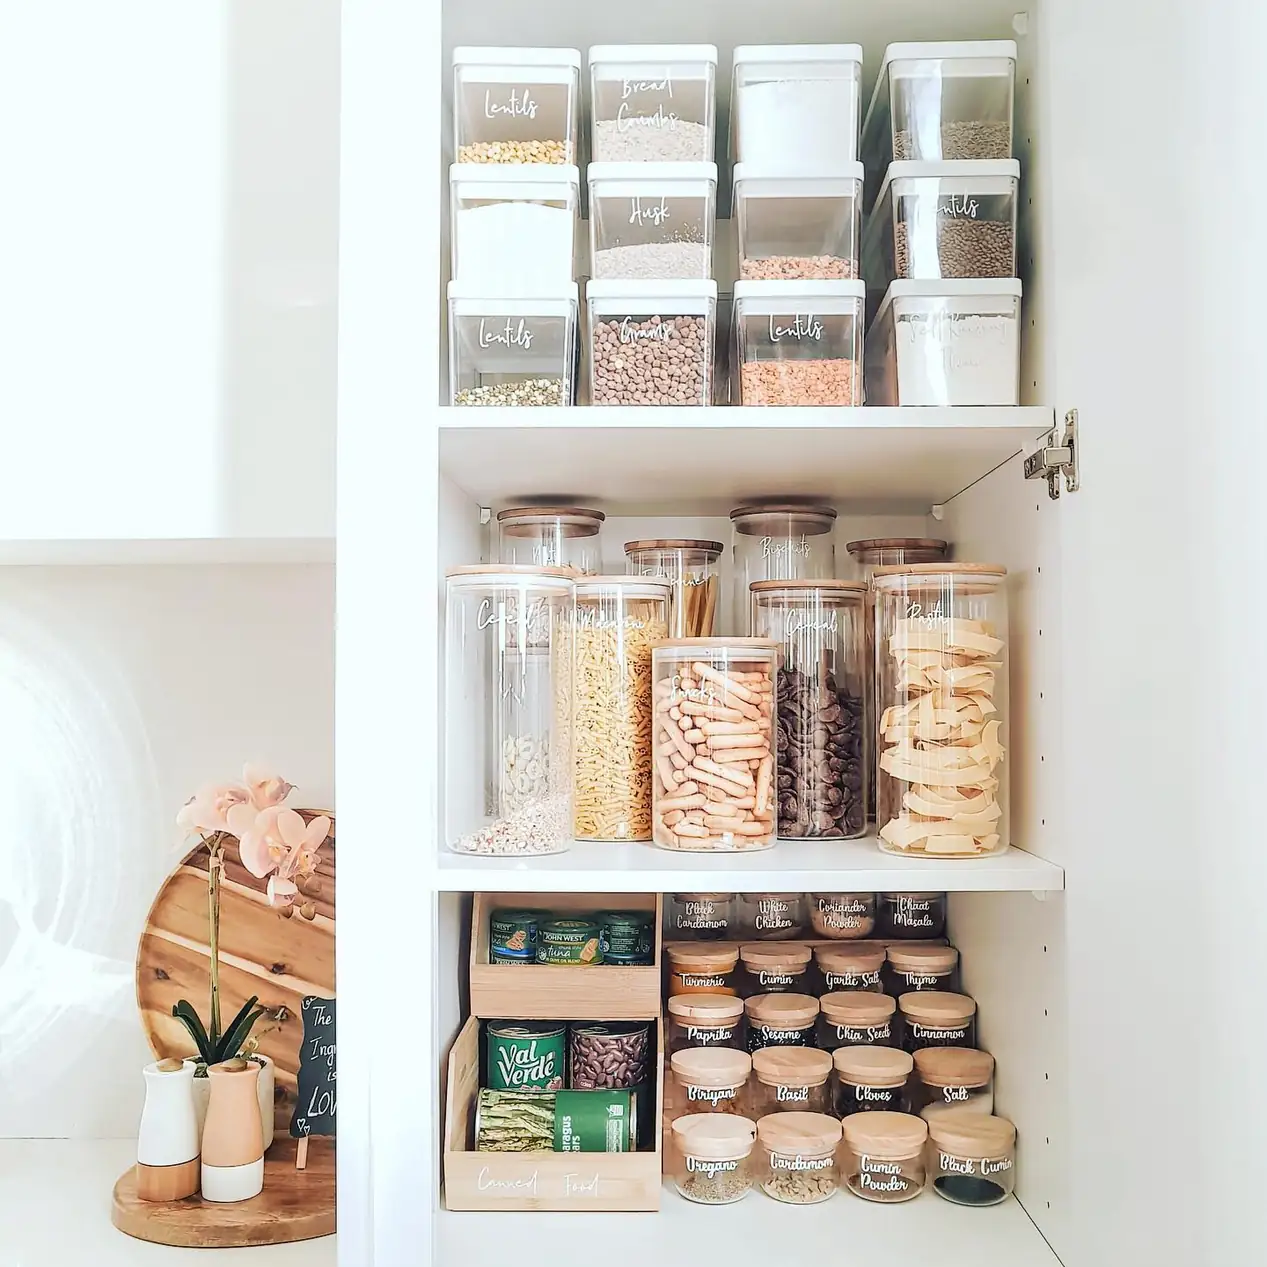
The interesting part here isn’t the matching labels. It’s the mix of container sizes.
Short square containers stack on the top shelf. Taller jars fill the middle. The smallest spice jars sit below.
That’s a better use of space than buying one container size in bulk and hoping it works everywhere.
Measure the gaps between shelves first. Then choose containers that actually fit them.
11. Don’t Force One Organizer Everywhere
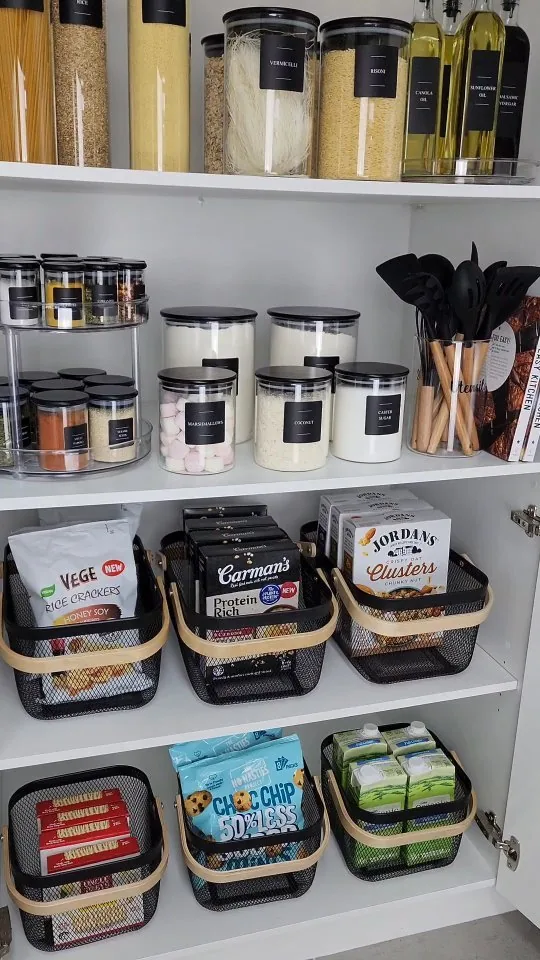
This pantry gets something right that a lot of perfectly matched pantries miss.
Spices spin on turntables. Flour and pasta sit in clear containers. Snack packs go into baskets. Utensils stand upright.
Each item gets the organizer that suits it.
That’s much more practical than making every shelf look identical. I’d copy the logic, not the exact containers.
12. Steal Space Under The Shelf
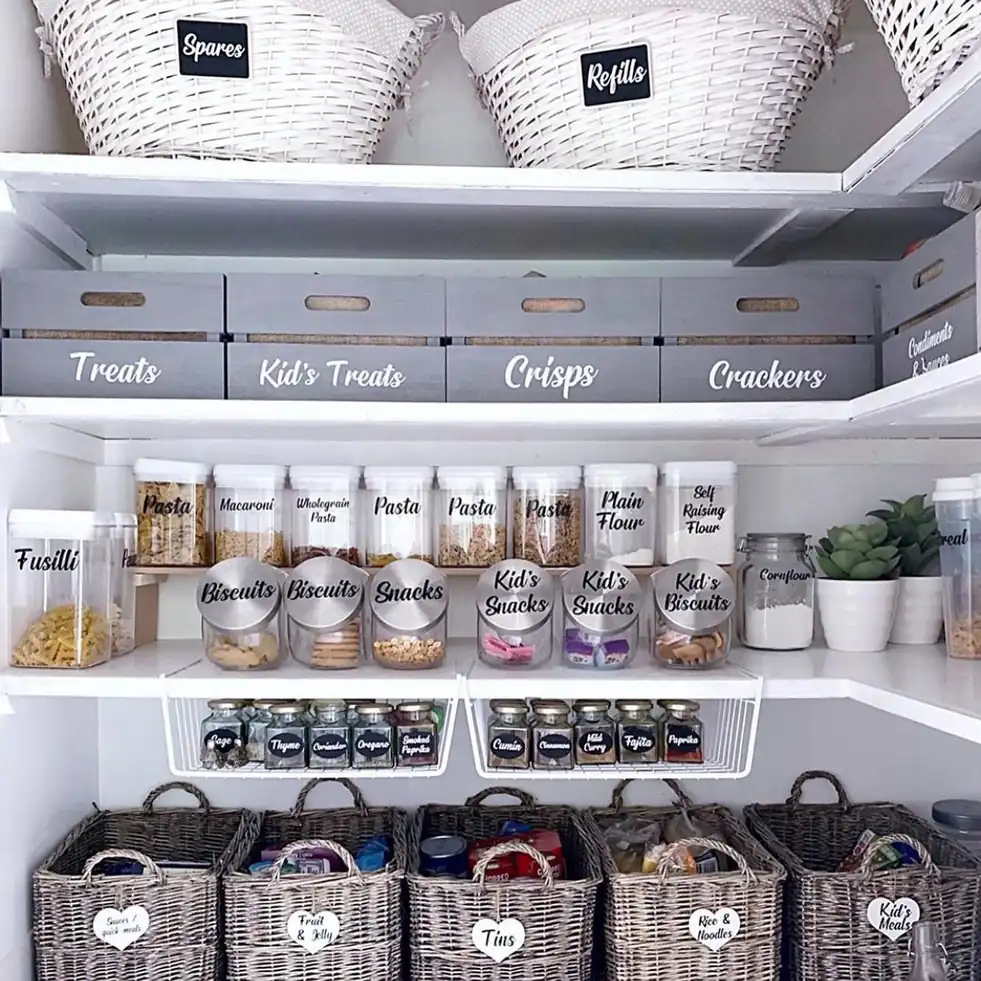
The hanging spice racks are probably the detail I’d steal from this pantry.
They sit underneath the main shelf, using a strip of empty space that normally does nothing. The baskets below still have plenty of room, and the spice jars stay visible.
This works best for light, short items. Don’t hang heavy containers just because the space exists.
Deep Shelf Pantry Fixes That Actually Help
A small pantry works better when everything is easy to see, easy to grab, and grouped in a way that makes sense.
If a small pantry feels hard to use, the problem usually is not the size. It is that the back of the shelf is doing too much hidden work.
Final Thoughts
Deep shelves work best when you stop treating the whole shelf as one big storage zone. Keep everyday food easy to reach, let baskets and pull-outs handle the back, and don’t force every item into the same kind of container. If you still have overflow after the pantry is organized, these ideas for using the space above the fridge can add a little extra storage without crowding the shelves.
You also don’t need to redo the whole pantry at once. Start with the shelf that annoys you most. One turntable, one pull-out bin, or one better front-and-back setup can make a bigger difference than a full set of matching jars.